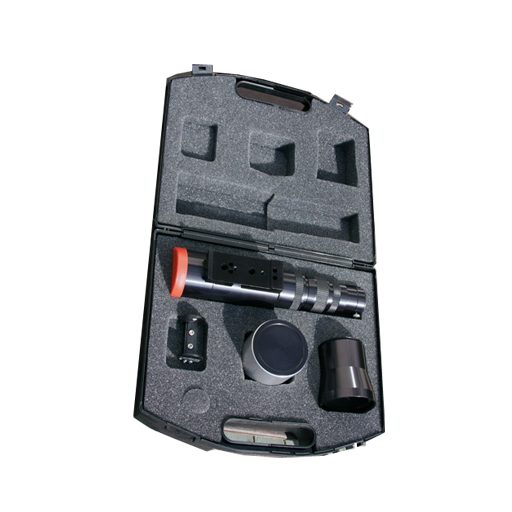
Solarscope SF filter system (single stacked module)
The Solarscope SF filter system is designed to attach to a regular astronomical telescope, converting it to a solar viewing instrument. Although the use of the SF filter system is completely safe, there are a number of important issues that arise when using such a system and it’s important to bear them in mind when fitting and using a filtered instrument.
The Sun is our closest star. Despite lying at a distance of 150 million kilometres, we still receive enough solar energy to allow life on Earth to be sustained. When a telescope is pointed at the Sun, it collects the energy that falls on its front aperture and brings it to a sharp focus. At the point of focus, the energy is condensed into a much smaller area and reaches dangerous levels. It is very important not to point an unfiltered telescope at the Sun unless you know exactly what you are doing. In no way should you attempt to view the Sun through an unprotected telescope. To do so invites the risk of eye damage and permanent blindness.
To avoid this, you should only ever point your telescope at the Sun after the filter has been correctly fitted. Although this may seem obvious, it’s very easy to forget, especially when you’ve finished your observing session. Your telescope must be moved to a safe position pointing away from the Sun before attempting to fit or remove a SF filter system.
To fit a filter, assemble your telescope in the normal way and ensure it’s pointing in a direction away from the Sun. You’ll find it easier to fit the front part of your filter if your telescope is pointing slightly up from a horizontal position. Also make sure your telescope is set-up correctly in terms of balance and that its mount is locked in position to avoid the scope moving when you’re trying to fit the filter.
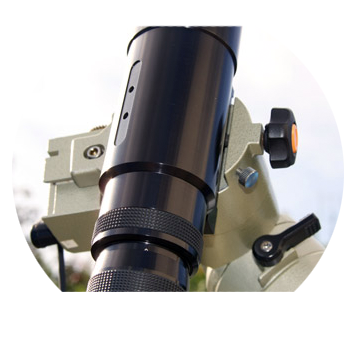
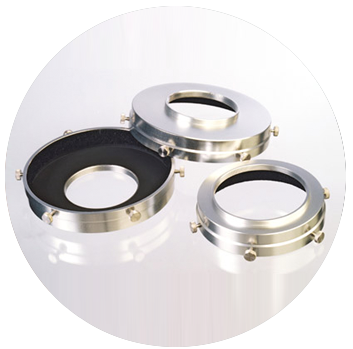
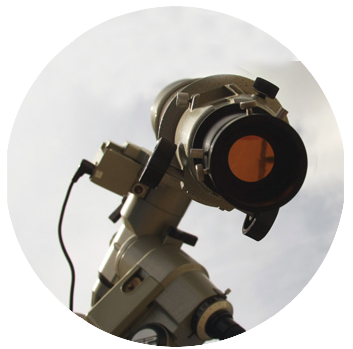
Fit the front adapter plate to the telescope. If using a refractor it’s normal to have to remove the dew shield before fitting the adapter plate. If in doubt please ask via the contact details shown at the top right of this page. Push the plate over the lens cell or appropriate telescope aperture and lock it into position using the set screws provided. It’s essential that the screws are tightened quite firmly to avoid the filter slipping off if the telescope is inadvertantly pointed down. A firm thumb-forefinger tightness is normally ideal.
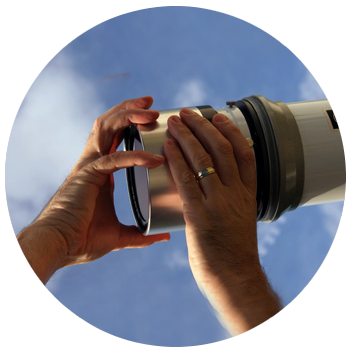
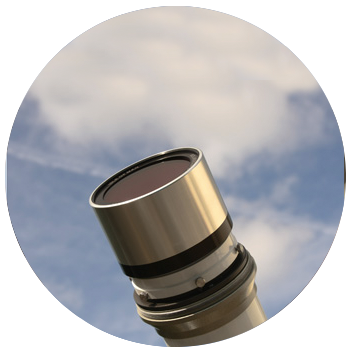
Once the adapter plate is secure, remove the front filter from the foam-lined case. This is the large cylinder in the case. Hold the filter with two hands at all times to avoid accidentally dropping it. The etalon filter within the front mounted cylinder is well protected but sharp knocks should be avoided because these can cause the etalon plates to detach. If this happens the filter system will no longer work correctly and a costly repair may be needed.
Rest the filter in its case hole with the the rear dust cover (the one closest to the visible thumb wheel) facing up. Unscrew the dust cover and put it safely to one side. Now lift the filter out of its case hole using both hands for safety. Firmly grip the cylinder from underneath and use the other hand to steady it as you lift it up to the adapter plate. The male thread of the filter screws directly into the female thread on the adapter plate. Line the threads up and carefully screw them together. While you do this, keep one hand under the filter and use the other to rotate the cylinder. It’s a good idea to make sure one hand is always gripping the cylinder. Grip with the rotation hand while offering support from below with the other hand. Then as you losen your grip with the rotation hand, make sure that the support hand’s grip tightens. Although this may sound complex, it’s not and once learned, the technique will help you keep your filter safe from accidental drops.
Screw the filter into the adapter plate as far as it will go. Being a precision match, the screwing action shouldn’t take too much effort. If it does, gently unscrew the filter again, observing the alternate gripping technique described above, and once detached, try again. At this point, you’re almost ready to point your telescope at the Sun. However, before you do this, check the finder scope. If one’s fitted, it either needs to be removed or covered up. If you don’t do this, pointing the main scope at the Sun will also point the finder in the same direction and damage as well as a potentially dangerous situation could occur.
With the front filter fitted and telescope finder removed or covered up, point the telescope at the Sun. There’s a simple way to do this which works very well. Simply look at the shadow of the telescope on the ground. If the scope is pointing at the Sun, then it’s shadow will appear as small as it can get. Once you think you’ve got it right, then you can proceed to the fine positioning stage.
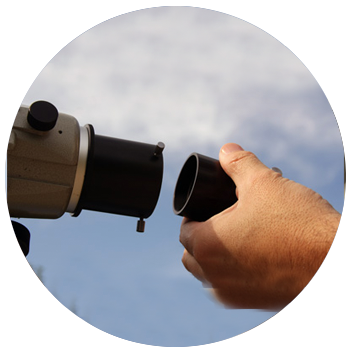
To do this, remove anything fitted at the eyepiece end of the telescope to just leave an empty 2″ barrel. Carefully unscrew the front dust cap from the front filter so that it’s open to the Sun. Place your hand behind the open end of the eyepiece barrel and see if you can see a bright red dot. This is the light which has passed through the front mounted filter and down the telescope tube. If you can’t see it, grasp the eyepiece barrel firmly between all of the fingers of one hand so that you can still see the palm of your hand which is acting as a screen. Unlock your telescope mount and move the scope using your ‘screen’ hand until you can see the bright red dot. Get this into a position where it’s roughly centrally coming out of the eyepiece barrel.
Lock your mount again, taking care not to let the scope move out of position and, if you haven’t already done so, turn on the mount’s drive if you have one. Insert the 2″ blocking filter into the eyepiece barrel and lock it in place using the thumbscrews on the eyepiece barrel. Finally insert an eyepiece or diagonal into the open end of the blocking filter. You can now safely look through the eyepiece at the Sun. Focus the scope until the view is sharp and crisp. When in focus and still looking through the eyepiece, use one hand to turn the etalon tilt wheel. Adjust this until you have a good, high contrast view of the detail on the surface of the Sun. If you have a long scope and find it hard to look and adjust at the same time, either get someone to help you or adjust in small amounts while you leave the eyepiece.
Take your time, get used what you’re seeing and enjoy the view. As your eyes become accustomed to what’s on offer, you’ll be astounded by what you can see.